

blurring background in photoshop cs6
There are times when you want to have a blurred background rather than your original image.
Maybe your background is distracting. A busy background is often impossible to crop out of your frame. But a soft or blurred background can fix that in no time.
In this post, we'll show you the easiest ways to accomplish a blurred background in Adobe Photoshop, step-by-step.


Using Photoshop for Blurred Backgrounds
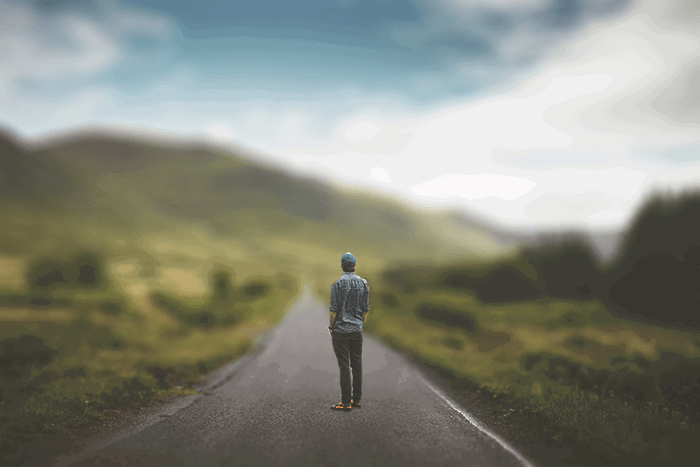
I'll show you an advanced but rewarding method to add realistic lens blur to your background. Please note that I will add more blur to this image than is realistic, so it translates better on small screens you might view this article on.
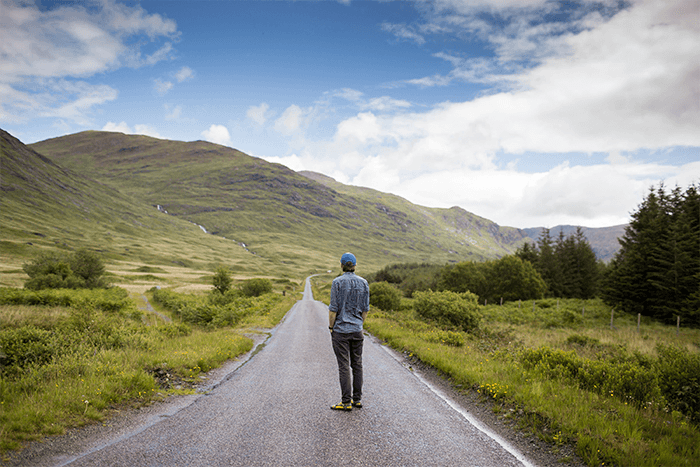
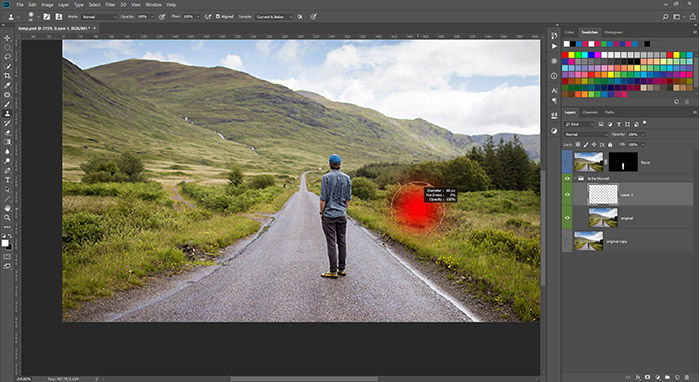
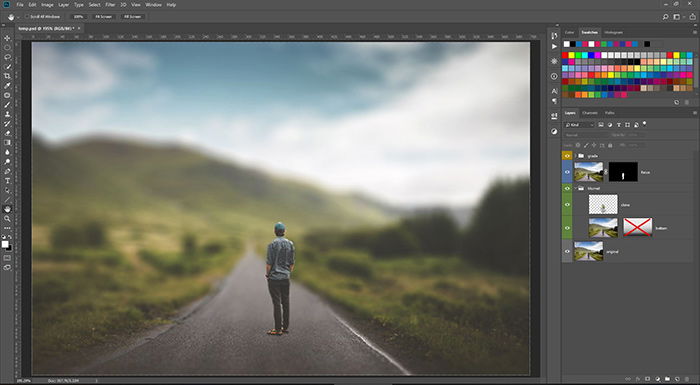
Open your image in Photoshop. Place it in the frame. If it was imported as a smart object (paper icon in the bottom right corner), rasterize it. Right-click on the layer name andrasterize.
Create a copy of your original layer in the layer panel. The top layer will be for the sharp part(s), and the bottom layer will be blurred.
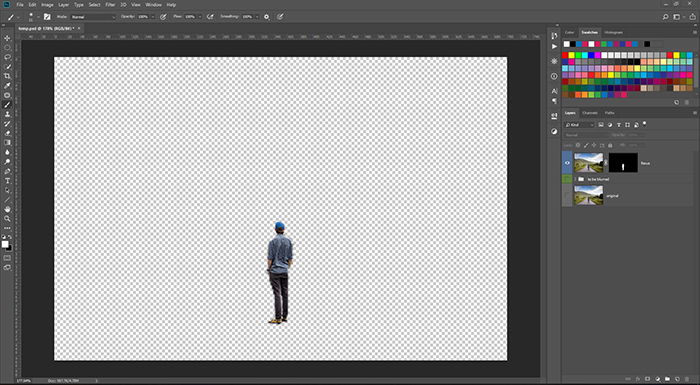
First, turn off your bottom layer, we'll work with the top first. Select your subject(s) with your selection tool of choice. Create a layer mask and fill everything that'snotyour selection with black. This step hides everything that's not your subject from the top layer.
Make the bottom layer visible and turn off the top layer. There are two ways you can continue from here:
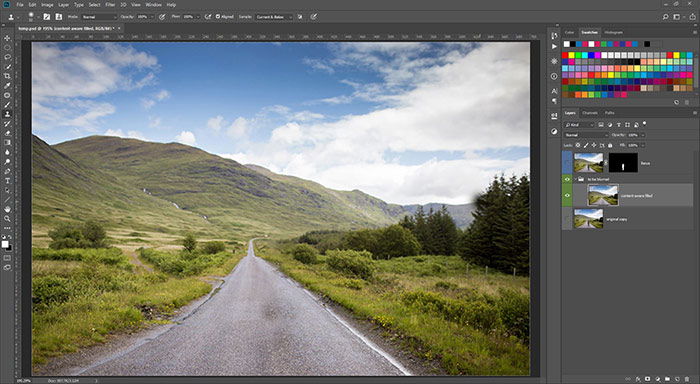
Hold Ctrl/Cmd while clicking on the mask of the top layer.This will select the mask. Then, increase your new selection by right-clicking and Transform selection.Make it big enough to cover your whole subject and a bit more.
Then, choose any of the selection tools from the left column. Right-click on your selection and hit Fill.From the drop-down menu, click on content-aware. If you've done the selection right, your subject should disappear. Don't go for ultimate precision, as this layer will be blurred anyway.
Alternatively, you can simply clone out your subject on a new layer above the to-be-blurred layer. Choose a low hardness for your cloned parts to blend well. After you're satisfied with the cloning, merge those layers.
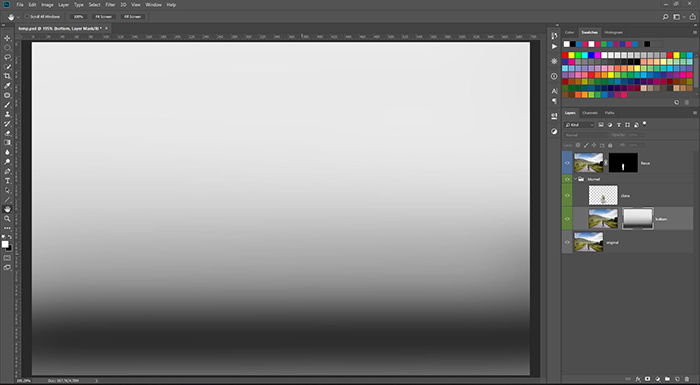
Either way, create a layer mask for the background layer (from which we've removed the subject). Paint with black where you want your layer to remain sharp. (Those areas will disappear: don't mind it. We'll bring them back.)
When done, go to the properties panel and select the mask. Pull Featherup until the transitions in the mask seem gradual. Hold Alt/Option and click on the mask to reveal it in full. Click on any layer to close the mask view.
This because real lenses also produce gradual blur. The closer something is to the plane of focus, the less blurred it will appear. If you want this effect to seem real on your image, you need to get the right amount and graduality.
Now, select the bottom layer again (and not its mask, but the image part).
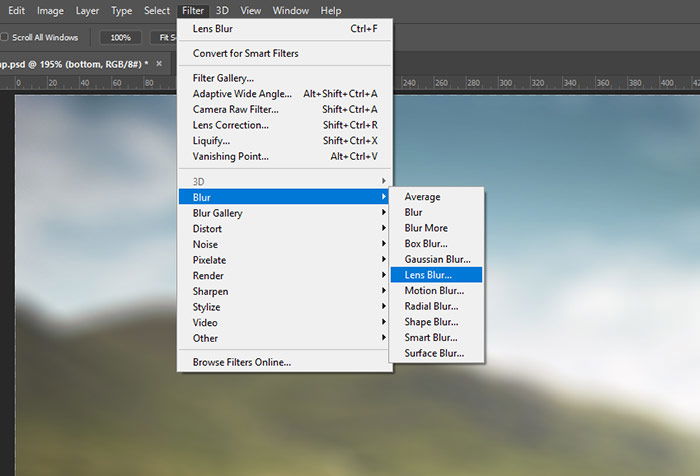
Go toFilter / Blur / Lens Blur. Note: if it's greyed out, you haven't rasterized the bottom layer, but you can do that now.
If you want more control over the type of the produced blur, choose one of the options under Filter / Blur Gallery. Field Blur, in particular, is great for this purpose. You can also stack them, first creating a layer of blurring with Field Blur, then adding graduality with Lens Blur.
ChooseLayer Maskas depth map. This option uses your previously created mask to determine where to blur and where not. Pull up Blur Focal Distanceto around 20 to leave a sharp plane of focus. This is crucial for the effect to be realistic.
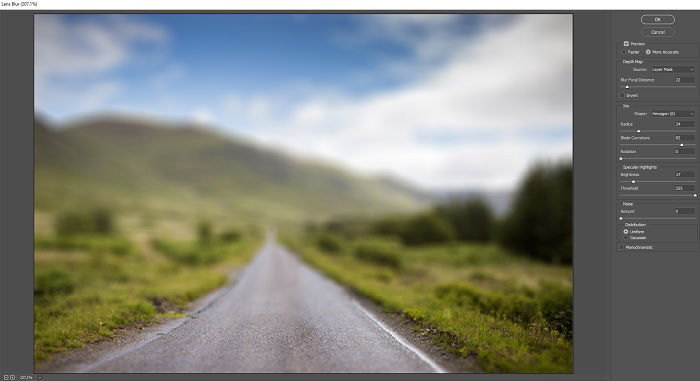
AdjustRadiusto taste. If you're working with a photo where you have distinctive blurred light balls, choose the Aperture blades to be round, 100%.
When you finished, press OK. Be aware that this is a destructive move in Photoshop. You won't be able to reconfigure the blur parameters afterwards.
Disable the layer mask of the blurred layer (Shift + left click on it).
Turn the top layer back on and adjust its mask to blend perfectly with the bottom layer. Apply further editing if you wish by adding new layers on top.
And there it is. To achieve realistic results, you'll need to practice and be accurate. The example above, of course, is exaggerated for better illustration. But if you do it well and subtly, this technique can be a powerful tool for you.
In my example, I blurred the photo intentionally too much. This amount of blur is rarely achievable in real life.
Conclusion
And there you have it! You can follow these simple steps to create a blurred background in Photoshop. You no longer have to worry if you don't manage to get this effect during the shoot.
For more editing knowledge, try our Effortless Editing with Lightroom course today!
blurring background in photoshop cs6
Source: https://expertphotography.com/blurred-background-photoshop/
Posted by: whitemintough.blogspot.com
0 Response to "blurring background in photoshop cs6"
Post a Comment